Monday, December 23, 2013

PieCaken- From The What, Why, How to Yum!


     Every now and then I browse the internet searching for new and unique recipes. I was in a mode where all I could think of is baking pies. While searching for new pie ideas I came across something that I never heard or seen before. Piecaken- a genius idea and kudos to whomever thought of it.  Piecaken is when a pie is baked within a cake. The outside it looks like a typical cake but when you slice a piece you get pie within it.

     There were all sorts of pie/cake combinations that I immediately thought of. In my search the most popular ones were lemon blueberry piecaken, chocolate cherry piecaken and vanilla apple piecaken. I thought of many other combinations and the time was perfect because I had to make my best friends birthday cake. Being that it was late fall I thought it would be fitting to bake something seasonal. So I made a pumpkin pie baked into a spice cake with a maple buttercream frosting, coated in pecans. (Spice Cake Recipe I used http://southernfood.about.com/od/spicecakerecipes/r/bl31221g.htm)


Beginning to assemble
Half of the cake batter followed by the pie 

Cake flipped upside down
Decorated cake


Cross section view

     Reading the blogs I was already aware of the process of making a piecaken. First you have to make the pie. Like the recommendations said I baked the pie the day before I was to bake the entire cake because the pie has to be completely cool. The next day I made a spice cake batter and was ready for assembly. In a greased 9 inch springform pan I poured half of the batter. Carefully, I placed the pie on top of the batter- upside down. You need to put the pie in upside down because once the cake is done you flip it over to frost & serve. On top of the pie, pour remaining batter making sure it is fully covered. Now its time to bake. I baked my piecaken at 350 degrees for about 1 hour & 20 minutes. Baking times vary so I recommend testing the cake after 50 minutes in 15 minute increments. Also, the perimeter of the cake cooks faster so halfway through I wrapped it with foil to protect it from over cooking while the middle finishes. Once it was completely cool, I frosted and decorated it. 
Chocolate Cherry PieCaken ready to be baked
Foil to protect outside from over-cooking


Finished product in half the time
      Now if you don't have the time here are some tips to make a piecaken within a couple of hours. For thanksgiving this year I had many dishes to make so my time was limited. I still wanted to make a piecaken but didn't want to go through the whole process. I bought a box chocolate cake mix, a ready to bake cherry pie and chocolate frosting. I know I cheated being that I usually bake from scratch but time was of the essence. I followed the same steps as above and had a baked and frosted piecaken within hours. So if you want to wow your family and friends, this is a great dessert thats intricate but can take minimal effort. Now go ahead and try to make one!! Let me know your results. Its as easy as pie...cake.. :) 
Cross Section View

Tuesday, June 11, 2013

The Red Velvet Waffle Challenge

     Last week I went out to dinner with a couple of friends celebrating a birthday. We decided to go to the popular southern fusion restaurant Soco in the Clinton Hill section of Brooklyn. I have heard of Soco and was eager to try their Red Velvet Waffles which I have seen posted on instagram. As a person who has made numerous red velvet cakes I was interested to see if their waffles have the same flavors of the cake.

     I ordered the lobster shrimp & grits which was delicious, highly recommended. The birthday girl ordered the waffles and fried chicken and I asked for a taste of the waffle. Sadly, the waffle had no notes of a traditional red velvet cake. No hints of cocoa powder or buttermilk. I was underwhelmed. It tasted like a typical waffle- which i think that is what batter they used with the addition of red food coloring. 
Soco's Red Velvet Waffles & Chicken
Soco's Lobster & Shrimp Grits


  Being that I am a mad scientist in the kitchen, before I left the restaurant I already knew that I would come up with a red velvet waffle recipe once I got home. I first did the research, looking up buttermilk waffle recipes to use as my base and add the typical red velvet ingredients. Then came the testing/eating. I tested the recipe, changed a few things and tasted the end result along with my guinea pig (my boyfriend) lol. We found a winner!!!

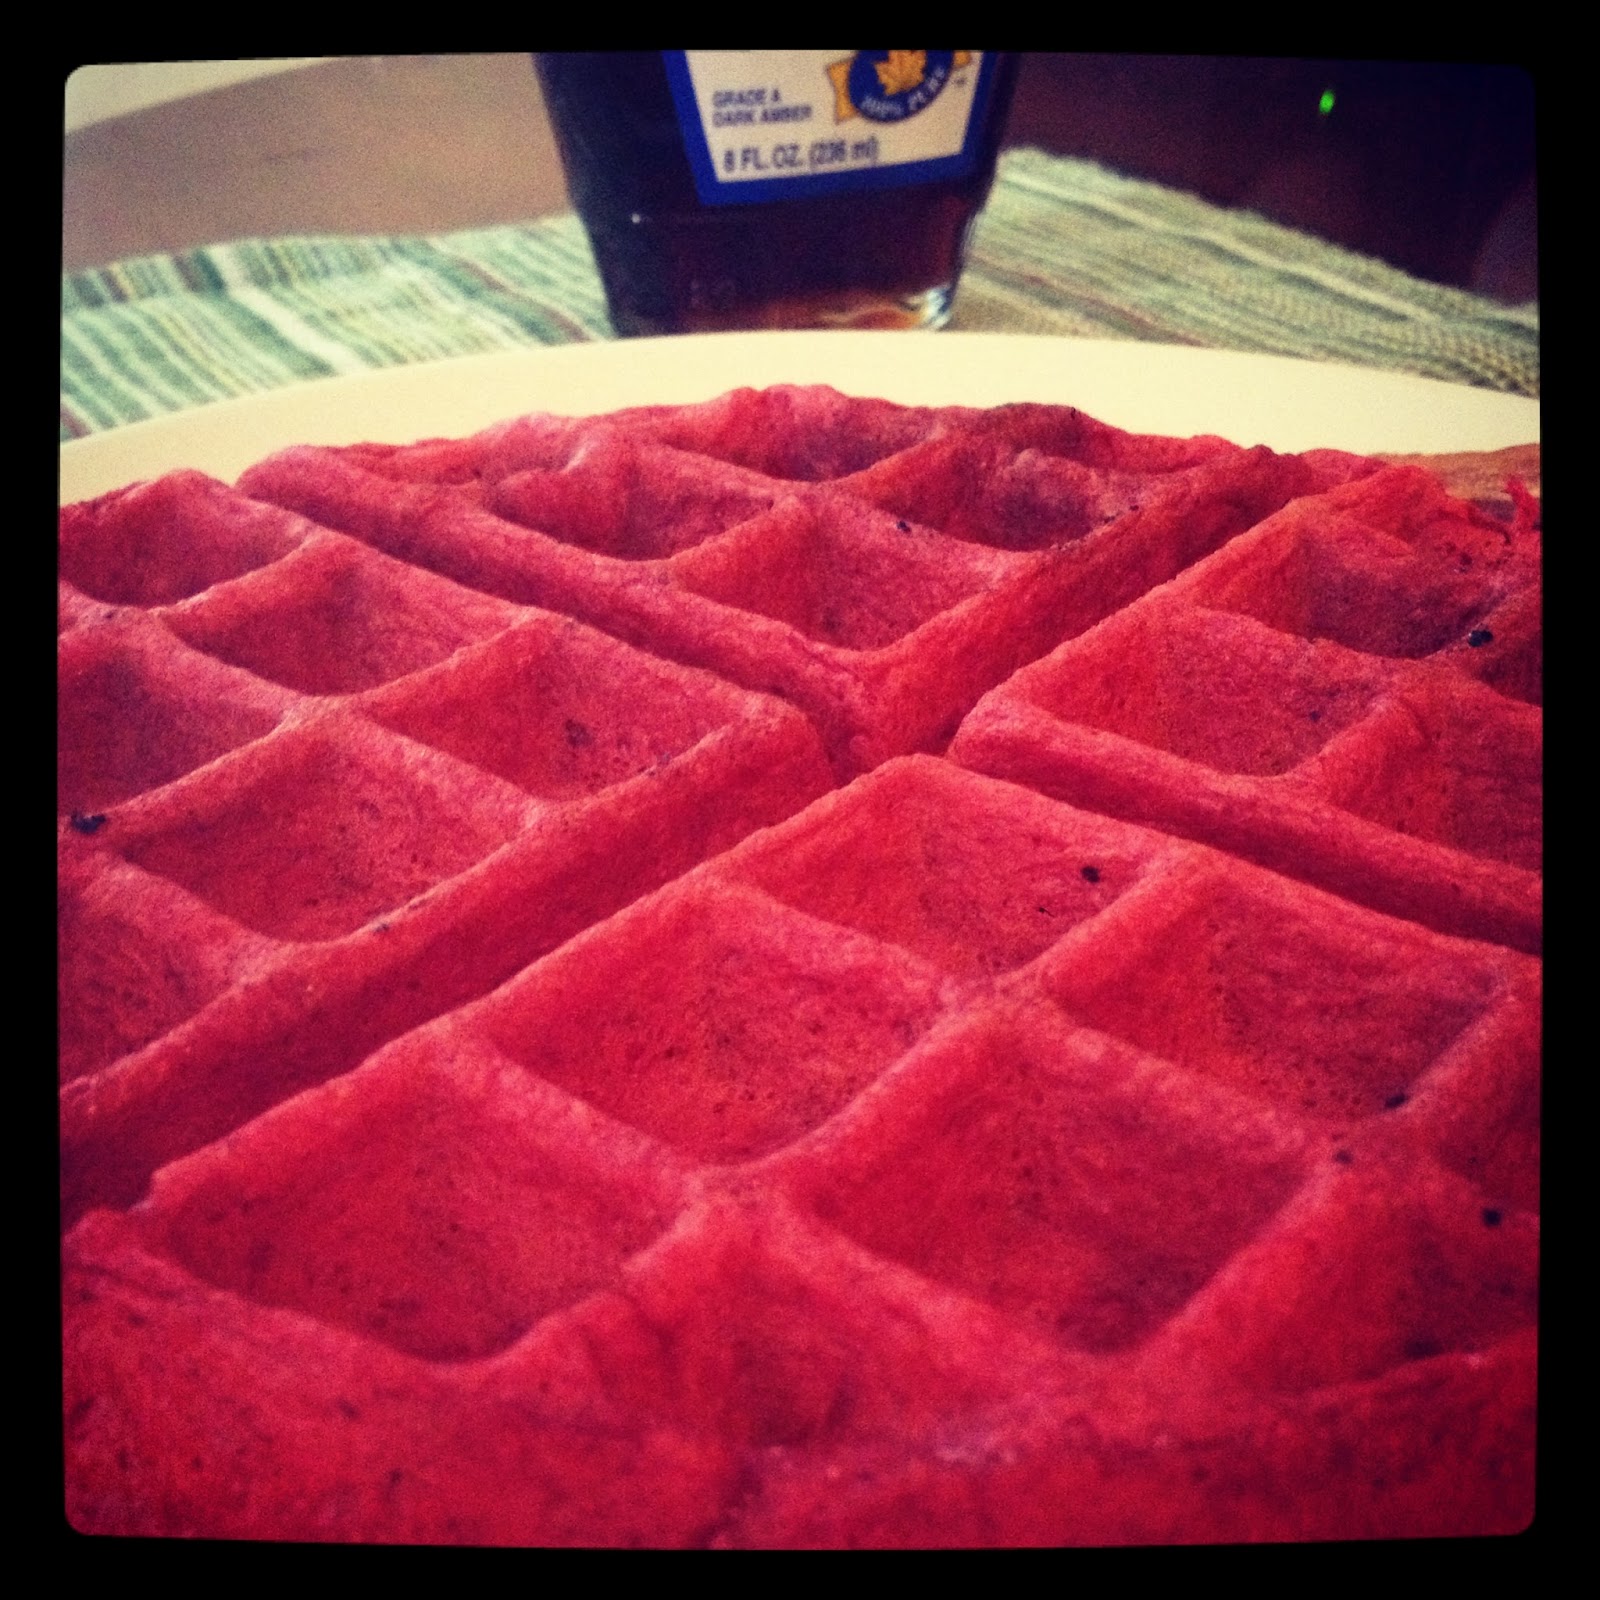
My Red Velvet Waffles
Red Velvet Waffles- Makes 4 Belgian Waffles
2 Cups - All purpose flour
1 teaspoon- baking powder
1/2 teaspoon- baking soda
1/2 teaspoon- salt
3 Tablespoons- cocoa powder
2 Tablespoons- sugar
2 cups buttermilk
1/4 teaspoon vanilla extract
1/2 teaspoon white or apple cider vinegar
4 Tablespoons melted butter
2 teaspoons- red food coloring
2 eggs- separated

In a mixing bowl, combine all of the dry ingredients together. Whisk until combined.
In a separate bowl whisk together buttermilk, vanilla, vinegar, melted butter, food coloring and egg yolks. (i usually combine all of the wet ingredients in the measuring pitcher to save on my bowl) In a third bowl, with a clean whisk- whip egg whites until they form medium peaks. 
Combine wet ingredients (not egg whites) and dry ingredients until mixed. With a rubber spatula fold in whipped egg whites being careful not to deflate all of the air bubbles. 
Pour into heated and greased waffle iron. Once cooked serve with maple syrup or cream cheese glaze. 

Note*- you do not have to whip egg whites separately. I like to do this to make for a lighter waffle. If you are short on time just combine the whole eggs with the wet ingredients. 

Cream Cheese Glaze
4 ounces- cream cheese, room temperature
1/2 cup- powdered sugar
1 teaspoon- vanilla extract
1/4 cup- milk

In a mixing bowl whisk together all ingredients until smooth. Drizzle on top of warm waffles

Try it out, and let me know what you think!!!


Tuesday, May 21, 2013

Practicing What I Preach....


Ooh Spring!! This happens to be my favorite and least favorite season at the same time. My favorite because we get out of winters chill, the earth is green and the plants are in bloom. My least favorite because I am a sufferer of allergies so this is the season I feel the worst. The warming temps are a constant reminder that summer is on its way really soon and like most I am in a frenzy of trying to get my summer body.

Few know or I make it known that I have a degree in Nutrition. In the past I have written menus, exercise and diet tips for people who are trying to get into better shape. I figured its about time that I practice what I preach. I have a great disdain for exercising and an immense pleasure for food! Don’t get me wrong I don’t go out on food binges in fact it’s the opposite. I don’t eat enough. I can have breakfast and go for the entire day without eating another meal. A horrible eating habit that makes your body go into starvation mode, slows the metabolism and stores whatever you do eat as fat. 

I finally had a lil talk with myself and decided that now is the time to change my ways. I know better therefore I can do better for myself. Its not about getting skinny, its just about being a healthier me. The joy I will have to not suck in my stomach or to actively want to take a ton of pictures because I know I wont look chubby in them. Its time to practice what I preach. To use this expensive Culinary Nutrition Degree I have along with exercise to become a better me. 

Since starting on my fit journey I have come up with a couple of tricks to help me along the way. The most challenging thing for me thus far is eating. I have to go through great lengths to make sure I am eating something every 2-3 hours. My go to items have been whole fruit, oat-bran muffins and smoothies. The oat-bran muffins are a recipe that I came up with one day. I wanted something that was easy to whip up, filling, healthy but low in calories. They are gluten free and the different dried fruits/ nuts can be substituted out for what you prefer.

Oat Bran Muffins aka Everything but the Kitchen Sink Muffins 13 servings, approx. 195 cal.
Vegetable Oil                  1 Tablespoon
Apple Sauce                   1/2 Cup
Greek Yogurt-plain           6 ounces 
Banana- ripe                   2-each
Eggs                              2 each
Agave Nectar                  3 Tablespoons
Oatmeal- plain uncooked   1 cup
Oat bran- plain uncooked   1 cup
Baking Powder                 1 teaspoon
Wheat Germ                   1/2 cup
Almonds, sliced               1/2 cup
Cranberries- dried           1/2 cup
Coconut- shredded           1/2 cup

Preheat oven for 350 degrees.
In a mixing bowl, mash ripe bananas with a fork. Once mashed, add vegetable oil, apple sauce, greek yogurt, agave nectar and eggs.
In another mixing bowl combine the rest of dry ingredients making sure everything is thoroughly combined.
Add wet ingredients to the dry and mix. 
With a muffin tin- either spray muffin tin or use paper liners. 
Using a 1/3 cup measure, scoop out batter and fill.
Sprinkle tops of muffins with oats (optional) and bake for 25 minutes or until top is firm to touch


Now usually I don't do this however, being that this is a personal blog I am going to post a picture of my starting point and progress thus far. I will post an updated blog in June sometime so you guys can see if I am actually practicing what I preach. Don't fear this will not turn into a fitness rant. I will remain true to food. A lil change sometimes is good though. 

CRINGE !!!
The glasses are day one, without the glasses are 3 weeks later, 11 pounds lighter
Now time to go work out!